(Photos by Tom McCorkle for The Washington Post; food styling by Lisa Cherkasky for The Washington Post) | Week 1: It started with a chocolate chip cookie I grew up with a sweet tooth in a household of health-food cheerleaders, with nary a package of Oreos in sight. But my father gave us a loophole: If we could make something sweet from scratch, we were free to enjoy it. Necessity is the mother of invention, so I first learned how to make chocolate chip cookies by reading the recipe on a bag of chocolate chips — and discovered that a batch of cookies goes way further than shoving handfuls of the chips in your face. We should all know how to make chocolate chip cookies. They're simply part of being a human in the world. I would argue that most chocolate chip cookies are good. So much can be forgiven in between sugar and chocolate. But then there are excellent chocolate chip cookies that make you want to close your eyes, point your finger at the sky and thank the heavens. That's the cookie we're going for this week. Excellent chocolate chip cookies don't happen by accident. They're carefully crafted and, believe it or not, rule-driven. So before we set out our butter to soften, here's a quick rundown of my rules of engagement for baking, which we'll come back to throughout this eight-week series. You can read through my full rules of engagement on Voraciously here, which includes more quick tips and examples to help you execute any baking recipe. Today, we'll explore these rules with the ever-reliable chocolate chip cookie. Rules of engagementHow to read a recipe Read the recipe (seriously, read the recipe), from start to finish, before baking. Review the ingredients list and read through the instructions. A recipe is part scripture and part pep talk. Ingredients are usually listed in the order you'll use them. Start at the top and follow the procedure to incorporate every ingredient, step-by-step. This ensures that nothing gets lost in the shuffle. Take note of the commas. The comma is everything in measurements. Every cut, chop and dice instruction after a comma in an ingredient list is to be done after the ingredient is measured. Pack, soften and preheat. Recipes often request that brown sugar be "packed." Take the back of a spoon and firmly (but not Hulk-style) press the sugar into the measuring cup, then add more and pack until it's flush with the top of the cup. Soften butter by allowing it to rest at room temperature until softened through. And preheat the oven to the stated temperature before baking. Temperature is key to properly activating ingredients. Is it done yet? Doneness is usually described with both a time range and visual characteristics. I usually set a timer to two-thirds of the stated time, then check and rotate my baked treat to determine how much longer it needs to meet those characteristics. Weight over volume
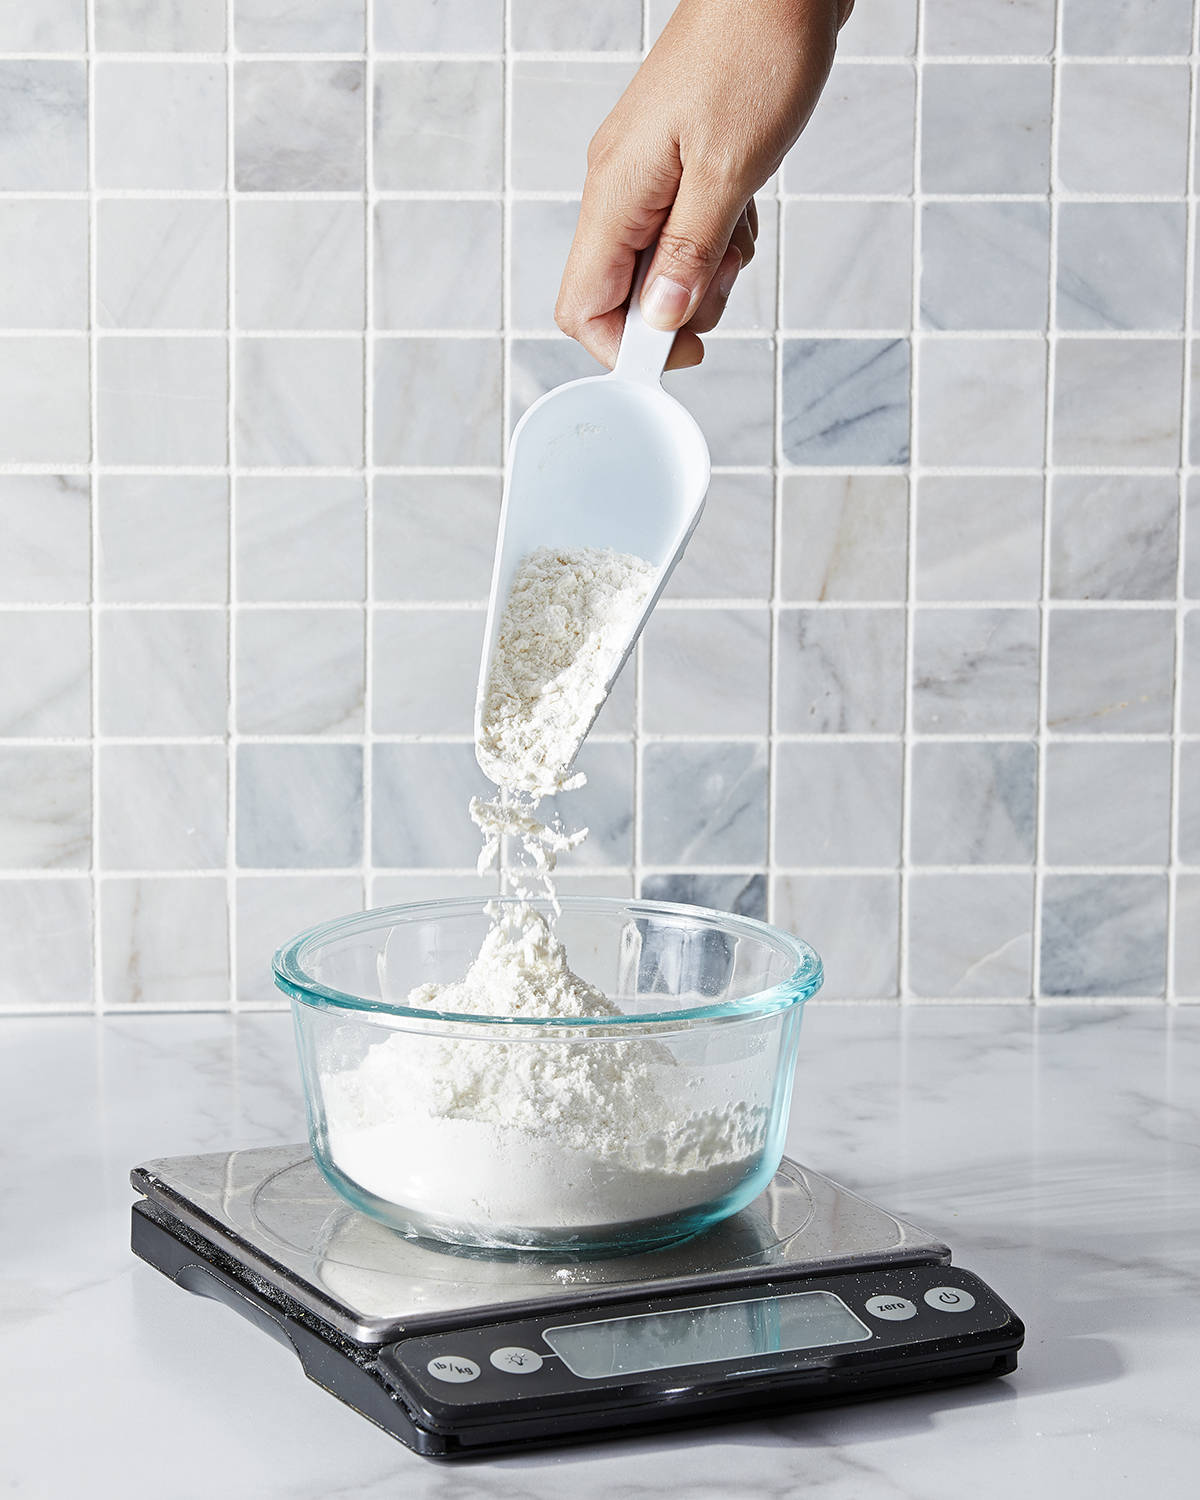
A scale might seem overly fussy. But I want you to give weighing a chance, because it is much more accurate than measuring by volume. Everyone can measure 1 cup of all-purpose flour differently by packing more flour into a cup than a recipe intends, but 125 grams of flour is always 125 grams of flour. Freshen your leavening agents and test your oven
If you don't find yourself baking a few times a week, chances are your baking soda and baking powder are past their prime. These are essential (and very affordable) ingredients, so add them to the grocery list if you think you could use some freshness. Use an oven thermometer to test the heat, because what reads as 350 on the dial may be different inside the oven. You want to know the actual temperature, for better or worse, before you bake. Always consider time and temperature
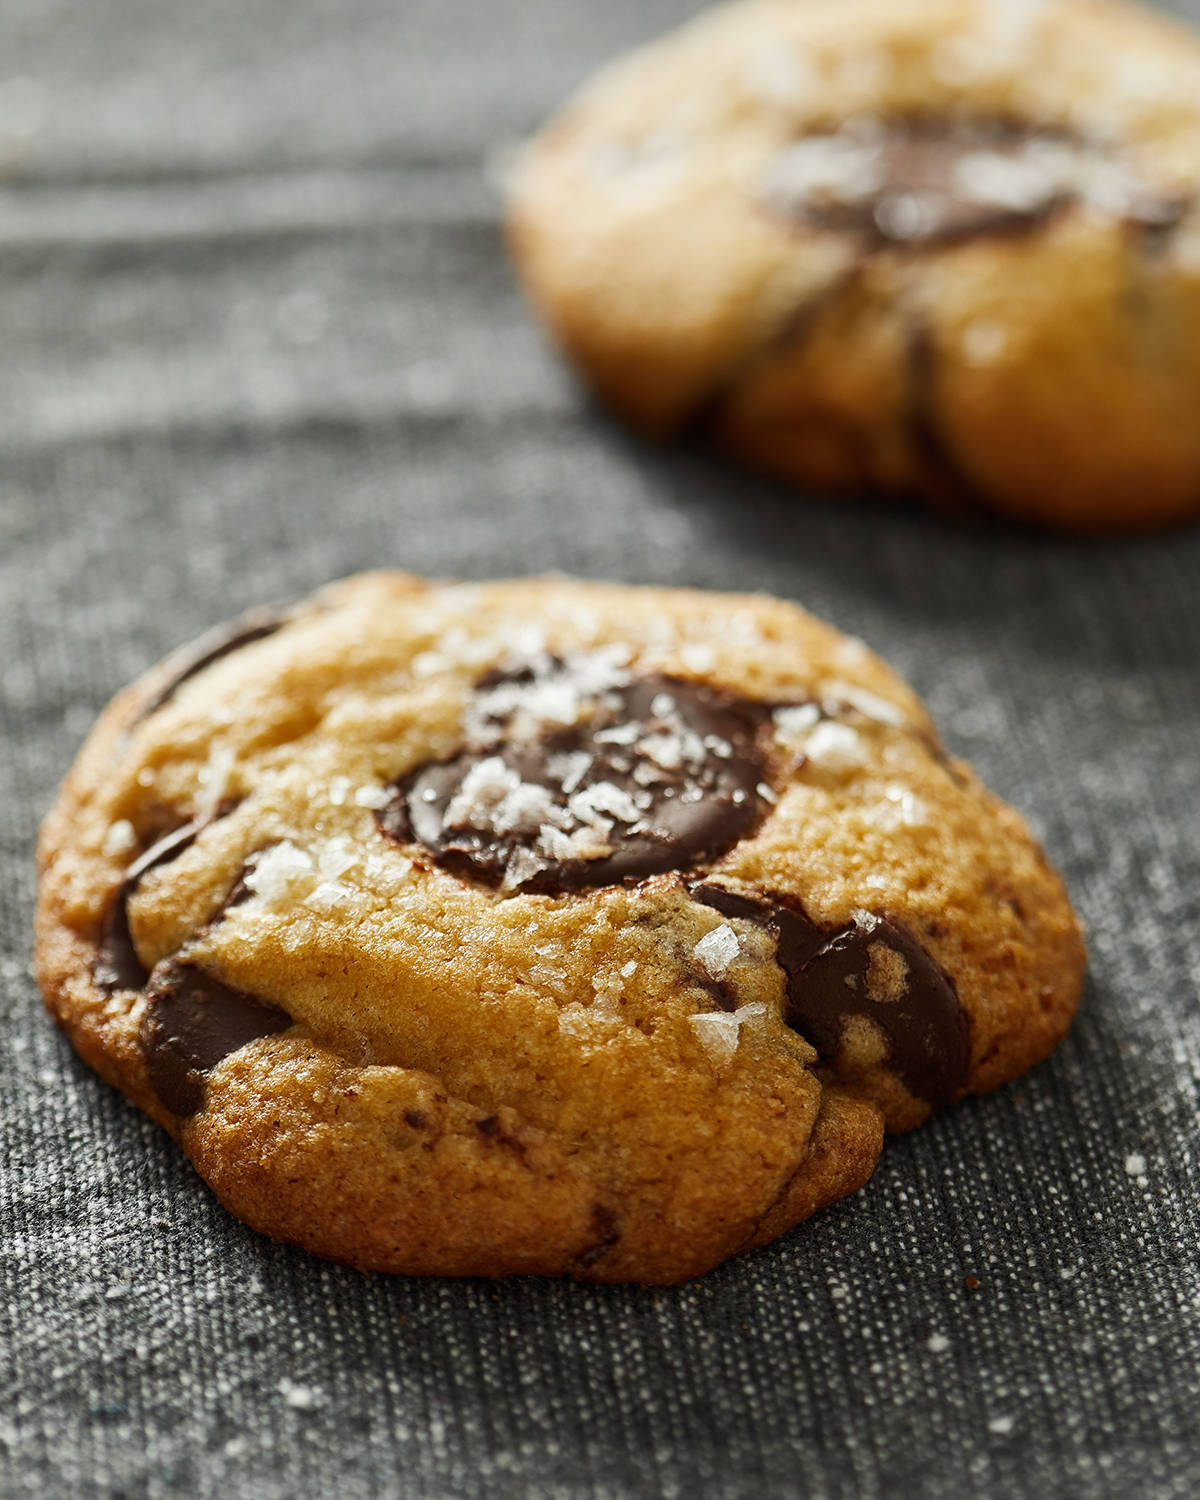
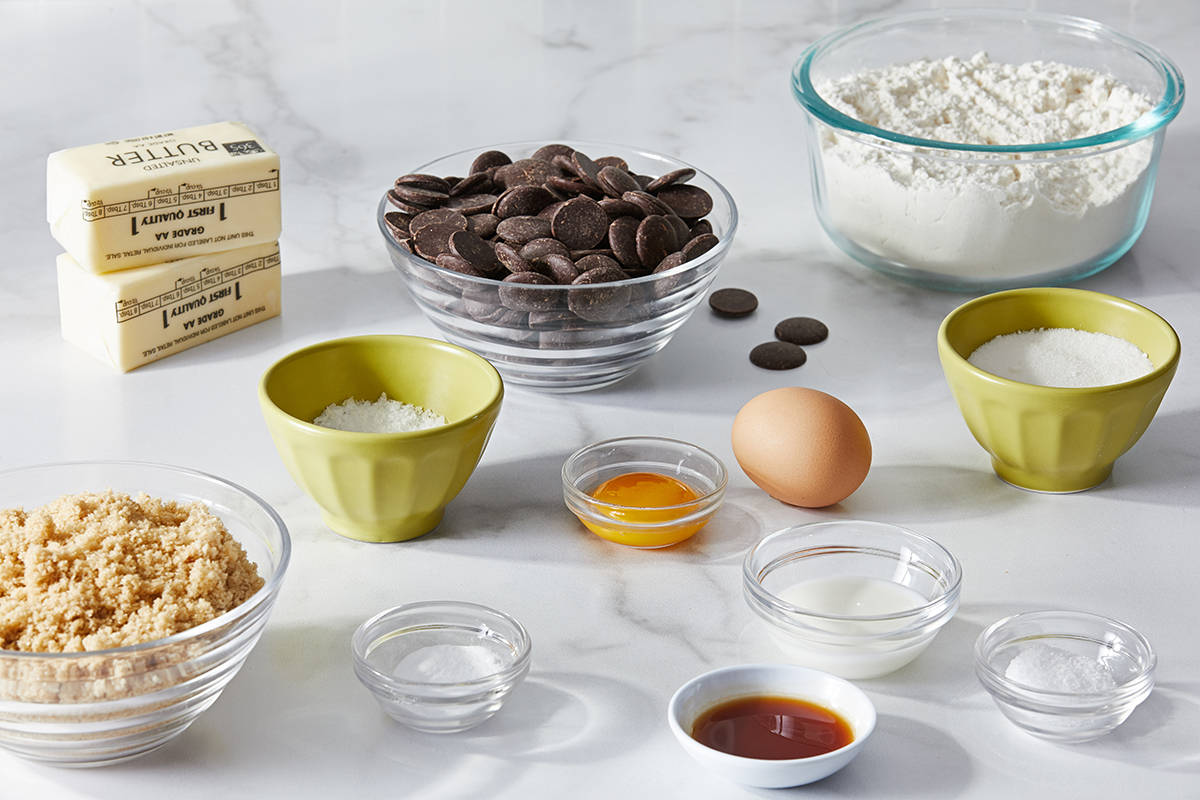
Successful baking comes down to these two things. Recipes call for particular times of rest, time to preheat and time to bake for a reason. In the same vein, ingredients must be at a particular temperature (often cold or at room temp) to best incorporate and spark chains of reactions once they reach the oven. Respect the time. Respect the temperature. When you see "at room temperature" in this week's recipe, I mean a range between 73 and 77 degrees. Room temperature butter will cream and aerate well with the sugars. Room temperature eggs will ensure the whites blend into the dough easily and that the yolks are extra-creamy and disperse well. You'll also notice the cookie dough below rests in the refrigerator, allowing the butter to rechill, the flour to hydrate and the flavors to meld. We'll bake the cookies from chilled so they don't spread across the pan, and we'll rotate them at a specific time during baking. I know what you're thinking: "That's a lot of rules!" Sure, but we're building know-how from the ground (and cookie) up. Baking at altitude? Check out this handy guide with tips for making slight adjustments to achieve the results you're after.  | This week's toolbox | Here's what you'll need to nail this week's recipe: Kitchen scale: As we discussed above, a scale helps consistently measure small and large batch recipes — and it saves you time cleaning up, too! Sturdy rimmed baking sheets: Thick, restaurant-quality sheet pans won't warp in the oven, bake evenly and can be used for any sweet or savory recipe. Parchment paper: This is key when it comes to making cookies that are evenly baked and easily come off their sheet pan. I use parchment paper to line just about every pan, ensuring that nothing will stick and cleanup is easy. Chocolate wafers: I'm very particular about the kind of chocolate I put in my chocolate chip cookies. Traditional chocolate chips are too small for my liking because they don't disperse the chocolate well enough. My absolute favorite are these Guittard chocolate baking wafers, because they're thin and wide, dispersing the chocolate more evenly through the cookies. That means more quality chocolate per bite. Electric hand mixer (optional): It's not essential, but it will save you time and energy. An electric mixer with low speeds will keep ingredients from getting overworked or flying out of the bowl. Here's an affordable option I love.  | Recipe | Classic Chocolate Chip CookiesThere are three tricks when it comes to these cookies. Thoroughly soften the butter; I prefer to leave my butter on the counter overnight to get it to room temperature (between 73 and 77 degrees), but if your kitchen is warm, or if you're jonesing for a cookie that same day, cut the butter into small pieces and leave it on the counter for about an hour. Chocolate wafers, which are round and flat, elevate this cookie beyond the chip because they spread out during baking, guaranteeing you some chocolate with every bite. Ideally, the dough would get an overnight rest in the refrigerator and be baked from chilled, though I've included a same-day option if you need your cookies on the quick. For easy printing and scaling, view this recipe on our website at washingtonpost.com/recipes. IngredientsMakes 36 cookies
Prep time: 40 mins, plus overnight refrigeration for the dough.
Bake time: 24 mins, plus cooling time. 2 sticks (8 ounces/226 grams) unsalted butter, softened (see headnote)
1/3 cup (66 grams) granulated sugar
1 1/4 cups (228 grams) lightly packed light brown sugar
1 large egg, at room temperature
1 large egg yolk, at room temperature
2 tablespoons whole milk, at room temperature
2 teaspoons vanilla extract
2 3/4 cup (340 grams) flour
1 teaspoon baking soda
1 teaspoon kosher salt
12 ounces (340 grams) milk, semisweet or dark chocolate wafers
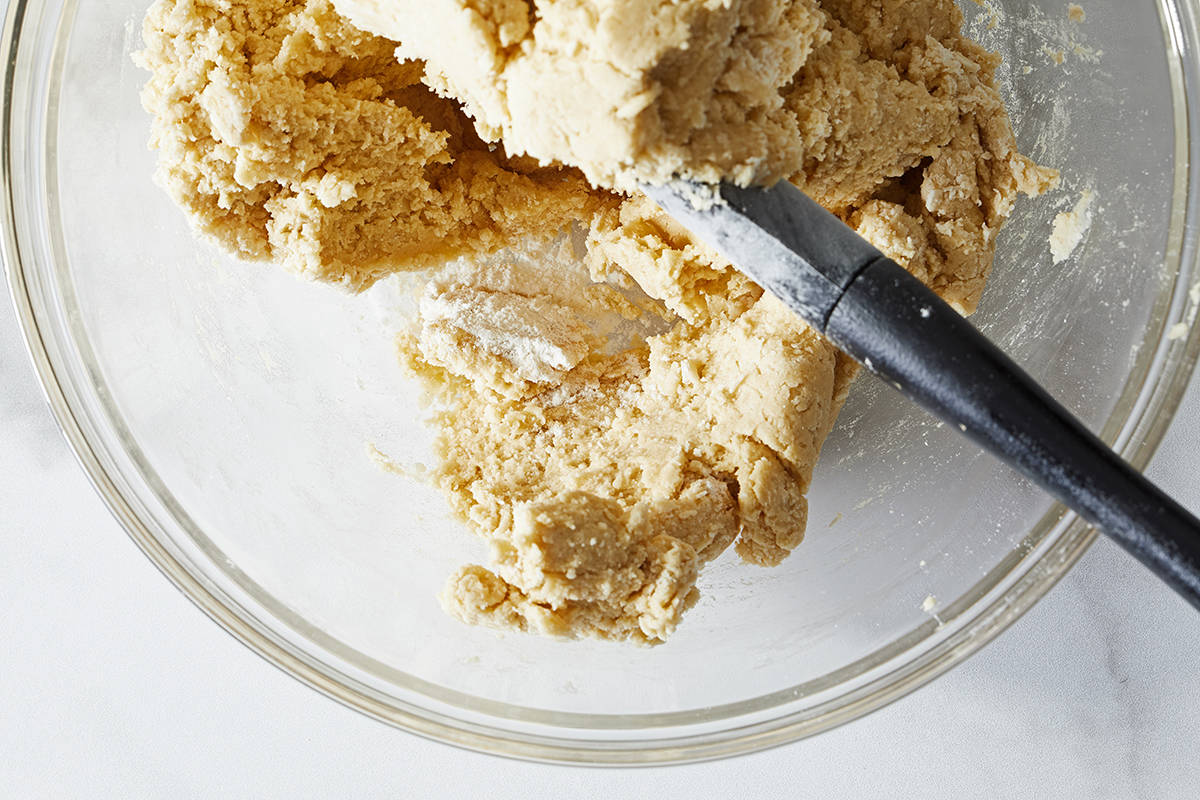
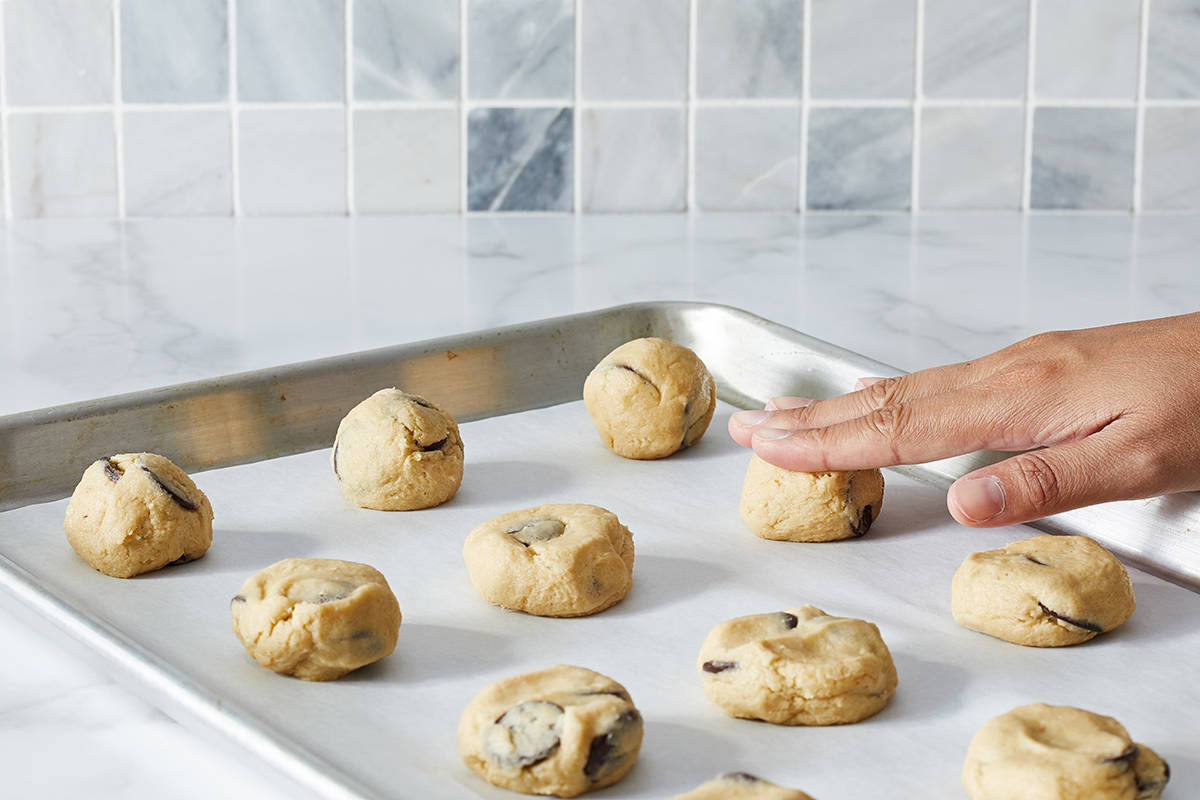
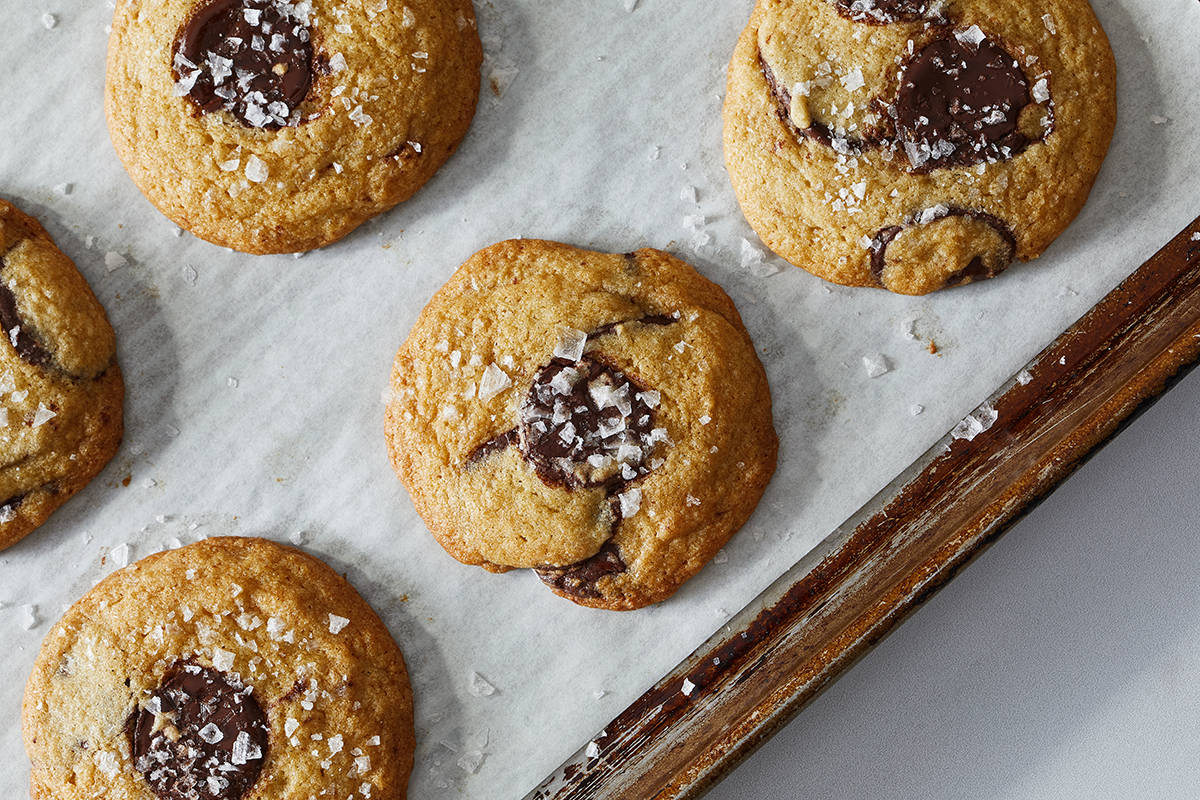
Flaky sea salt, for topping (optional) StepsIn a medium bowl, combine the butter, granulated sugar and brown sugar. Using an electric hand mixer on low speed, beat the ingredients until light and fluffy but still a bit grainy, about 3 minutes. (If mixing by hand, you'll see the sugars just begin to dissolve into the butter as they're combined, 4 to 5 minutes.) With the mixer running, add the whole egg and beat (or stir) on low until thoroughly incorporated. Add the yolk and milk and beat (or stir) until thoroughly incorporated. The batter will begin to look smooth and glossy. Beat (or stir) in the vanilla extract until combined. In another medium bowl, whisk together the flour, baking soda and salt and thoroughly combined with a whisk. Add the flour mixture to the butter and egg mixture and mix on low speed (or stir) just until the flour is incorporated. Using a silicone spatula, scoop to the bottom of the bowl and gently incorporate any hidden pockets of flour. Fold in about 10 ounces of the chocolate wafers (you can eyeball this; just be sure to reserve a handful of wafers to top the dough balls). Spoon the dough onto parchment paper or plastic wrap and wrap it into a disk or log (whatever will fit best in your refrigerator) and refrigerate overnight. If baking the same day, use a tablespoon to portion 2 tablespoons (30 grams/1 ounce) of dough per cookie — you should get 36 — and refrigerate until thoroughly chilled, at least 1 hour and up to 3 hours. When ready to bake, place a rack in the upper third of the oven and preheat to 350 degrees. Line a rimmed baking sheet with parchment paper. Transfer the chilled dough to the counter. If the dough was chilled overnight, portion out the cookies as instructed above. Use your hands to roll each cookie into a ball and place on the prepared cookie sheet. Allow about 2 inches of space in between each dough ball. Gently press each dough ball into a thick disk, tuck 2 to 3 chocolate wafer into the top of each dough ball, and sprinkle generously with flaky sea salt, if using. Bake one sheet at a time, for about 12 minutes, rotating the pan after about 7 minutes; the cookies should be golden brown. (If you want more crisp edges and deeper color, bake for 1 more minute.) Let the cookies rest on the sheet for 3 minutes, then carefully transfer to a wire rack to cool completely or until warm. The cookies are best eaten the day they're made, though they also store well in an airtight container at room temperature for up to 2 days. NOTE: The dough can be frozen, wrapped in plastic wrap for up to 1 month. Defrost in the refrigerator, then portion as instructed above and bake. Nutritional facts (per cookie): Calories: 170; Protein: 2 g; Carbohydrates: 20 g; Fat: 9 g; Saturated Fat: 6 g; Cholesterol: 25 mg; Sodium: 70 mg; Fiber: 1 g; Sugar: 11 g. Did you make the recipe?We want to see how your cookies turned out! Share your Baking Basics dishes with us on Instagram with #eatvoraciously. Next week: When it comes to perfect pound cake, grandmas know best. Have a question about the recipe?Email us at voraciously@washpost.com or message @eatvoraciously on Instagram. If you're having trouble viewing or receiving this or other newsletters from the series, or have other email tech questions, drop us a note here. Visit Voraciously.com for recipes, how-to guides, the latest food trends and much more. Joy Wilson is a self-taught baker turned professional, food photographer and cookbook author. She is the author of "Homemade Decadence" and teaches baking workshops at her studio, the Bakehouse, in New Orleans. Find her at @joythebaker on Instagram and Twitter. |